Showing posts with label labels. Show all posts

Wednesday, December 12, 2012

tea stained gift tags.

i'm a little obsessed with antiquing paper. i've done it for ornaments, framed art, a cowboy wanted poster,
 and now gift tags for christmas.


i love it because it's easy, cheap, and has such a stunning effect.

in the past i've always used coffee, but i'm not a coffee drinker. i'm a tea girl. i was always under the impression that  tea wouldn't work as well - not the case.

first, i typed up the label in word, changing up fonts and text size for fun. i printed them on card stock and punched them out with my mom's "stampin' up" gift tag punch. 


then i laid them out on my super gross cookie sheet (we switched to stoneware cookie sheets awhile ago, so i pretty much only use this for staining paper. incase you were worried i actually cooked on that greasy thing.)


i boiled about 3 cups of water with a tea bag (the darkest tea i had was a chai. something like sleepytime might not work as well.) for about 15 minutes to get it concentrated. i attempted the same method i used when antiquing with coffee (pouring it all over the paper on the cookie sheet), but the stain was so dark i couldn't read the tag.

i tried to water down the tea, thinking i had boiled it to long, but it still came out too dark.  3rd time's a charm - i dipped the tags in the tea and laid them out on the cookie sheet. perfecto.

you know they're done when the tags start to pull away from the cookie sheet. click here for a visual.


sorry this is a little blurry.
i absolutely love adding personal touches to homemade gifts! i also contemplated gluing the paper to fabric after i stained it to add a layer of texture, but didn't have any fabric on hand that looked right. these would also look neat with torn edges! the possibilities are endless!

love and personalized presents,
amber.

Monday, August 6, 2012

organizing manuals.

i used to think i was being organized by having all my manuals in this:
but the truth was, i hated the idea of digging through this box, looking for multiple papers for one product. i don't want to tell you how many kitchen appliances have stopped working in the last 5 years, that were probably still under warranty, that i didn't return because i hated this box. i should have taken a picture of the mess inside.

but, thanks to pinterest, my dread is no longer.

in comes the manual binder - 


creative idea #28: manual organization.
idea sparked by: www.simplyfrugal.ca

tools:
  • large binder - a few manuals take up a TON of space! i think mine is at least 2 inches.
  • page protectors {preferably the ones that seal all the way up on both sides. i have some in here that are only closed on one side and the manuals slide around too much and almost fall out.}
  • sticky tabs
  • sharpie
  • printer paper
  • printer
directions:
  • insert manuals into page protectors. group all papers for each product into one sleeve.
  • use sharpie and tabs to label each sleeve.
  • create pages to insert into binder cover to label binder. i got creative and labeled mine "manuals." {after i took these pics}


glory hallelujah. 

i don't dread needing a manual anymore because they're easy to find and all grouped together! no more digging in a dusty box :-)

love and happy manuals,
amber.

Thursday, July 5, 2012

recipe organization.

a few years ago i was in dire need of help. my recipes were ALL OVER THE PLACE. i had some of them in misc piles, in binders, on the computer, in magazines, etc., etc. i hunted high and low for organization ideas. i'd seen lots of different methods, but i needed something that worked with my train of thought not someone else's {every body works differently, so should their organization. i needed something that fit me}. 

i finally came up with a game plan that merged several different ideas i've seen over the years and i've never looked back. it works perfectly for me! not gonna lie, it took sometime, but i did it all in 3 phases, which helped to break up the daunting task.

in a nut shell, i created folders to hold all the recipes i've saved that sound yummy, but i've never tried. i also created a family cookbook, full of recipes that we've tried and loved! no more going to multiple places to find recipes or sifting through things i haven't made mixed with things i have. the best part about this though is that it's STAYED ORGANIZED! it's so easy to temporarily store something i don't have time to specifically file, keeping things decluttered until i have the time to put it right where it goes. hope this helps you think of a method that works for you!


creative idea #20: recipe organization.
idea sparked by: sadly, i don't remember where all the bits and pieces of the idea came from. it's been awhile.


PHASE 1: recipes you HAVEN'T tried {loose pages}.

tools:
  • folders. {# depends on how many categories you chose.}
  • magazine holder.
  • address labels.
  • sharpie.
  • loose leaf recipes.
directions:
  • gather all the recipes you own, that you've NEVER made before. tear them out of magazines, print them off your computer.
  • determine how you want to sort them and begin separating them into piles. i chose:
      • breakfast.
      • drinks.
      • condiments.
      • snacks, apps, and sides. {these 3 things overlap in my opinion, so i combined them.}
      • entrees.
      • salads.
      • bread.
      • dessert.
      • food facts. {i keep misc info here like how to substitute oil for butter.}
  • place each pile of paper into a different folder. 
{i put all the small pages on one
side and the full sized pages
on the other so they're easier
to find.}
  • use an address label and sharpie to label each folder.
  • place all folders into magazine holder. through out the week, as i find recipes i like, i stick them in the magazine holder. whenever i have the time, i sit down with the stack of unsorted recipes and put them all away.
{i chose a different design
for each folder so i can
remember which design is
which category and grab
what i need quickly
rather than pull out each
folder to find the "entree"
one, or whatever.}
  • give yourself a high five.
PHASE 2: recipes you HAVE tried {loose pages}.

tools:
  • a binder. i went with a 2 inch one.
  • page dividers.
  • 3 hole punch.
  • printer paper.
  • tape.
  • loose leaf recipes.
directions:
  • gather all the recipes you own that you HAVE made before. tear them out of magazines, print them off your computer.
  • insert labels into page divider tabs that are the same as the categories you chose in phase 1.
{i need to redo my tabs.
i never finished them.}
{i also added tabs for things like:
  • Grocery List - i keep notebook paper behind this tab so i can make my list easily. 
  • Try Soon - for recipes i can't fit in this week but that i don't want to forget that it sounded so good! i check here first when i'm meal planning.
  • Seasonal Produce - I'm trying to get better about shopping what's in season, but i can't meal plan around it if i can never remember what's fresh! i printed off a list for all 4 seasons. }
  • BONUS STEP: add subcategories. i only did this in the entree section with the following subtitles:
      • crockpot.
      • sandwiches.
      • ethnic.
      • grill.
  • 3 hole punch all your recipes and place in the corresponding section of your binder.
  • any recipes that were small on a large piece of paper, i cut out. i taped these, along with other small recipes, to computer paper and hole punched them. i wanted this to be as uniform as possible! i didn't want all my pages to be different sizes.
  • give your self a round of applause.
PHASE 3: recipes you HAVE tried {cookbooks}.

tools:
  • notebook paper. {1 per category in your binder - including subsections}
  • pencil.
  • all your cookbooks.
directions:
  • at the top of each page, write a different category name.
  • go through every stinkin' cookbook you own. if you made it and you would eat it again, write it down on the corresponding piece of notebook paper with the name of the cookbook and page number.
  • when you are FINALLY finished, insert each page at the beginning of each corresponding section of your binder.
  • whenever i made a recipe we loved but don't have the time to hole punch it and put it in the right section (sounds silly, but it happens...), i just stick it in the front pocket and get to it when i can!
  • treat yourself to a nap.
how does this work?
  1. anytime you make a new meal from your folders either throw it away if you didn't like it, or insert it into your binder if you would make it again.
  2. you have now created your own personal cookbook. a giant go-to for all your favorite recipes. no need to shuffle through recipes you don't really like to find something to make for company, you have tried and true recipes at your finger tips!
misc. tip:

take notes on all the recipes you keep. i like to write down: 
    • if it would be great for company.
    • what i would change next time i make it.
    • if it would freeze well.
    • if it would be a good meal to take to someone.
    • what would go well with it.
    • who we made it for if we had company over that night. it's fun to go through the binder and remember all the fun times we've had at the dinner table. :-)
love and organized recipes,
amber.

ps - i'm working on rearranging my pinterest food boards to line up with these categories also, and to only include recipes i haven't tried. i'll delete any i have, to remove visual clutter and keep the concept the same as my folders/magazine holder. i'm all about uniformity.


Monday, June 25, 2012

glass jars: saving and reusing

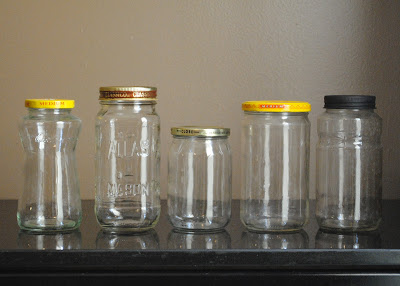
my friend and i were discussing my recent adventure with glass jars and i decided i should post about it. awhile back i read a blog post from keeper of the home where she briefly mentioned this topic and i got to thinking about how many free {kind of} glass jars i throw away ALL THE TIME!  you can do so many things with leftover glass jars from pasta sauce, pesto sauce, syrup, kombucha, milk, wheat germ, jams and jellies, peanut butter, salsa, vinegar, oil, artichokes, pickles, {do i need to go on?} each size and shape is perfect for a different thing and saves me money!


creative idea #18: saving and reusing glass jars
idea sparked by:www.keeperofthehome.org {i can't find the exact post}


  • first step - training yourself to remember not to throw away the jars! this was hard for me at first :-)


removing labels
  • for the longest time i'd been peeling off what i could of the label, soaking it in water, scrapping off what i could with my fingernails, and then sitting in front of a movie while rubbing goo-gone on all the bottles until they were clean. 
this is what i was previously scraping off with my 
fingernails, after soaking the bottles in water. 
with some jars it's a walk in the park, others, 
it's a marathon on a 100 degree day.
i'm seeing a little crash and burn in my future. 

luckily i came across a video on pinterest about how to easily remove labels. sadly, it doesn't remove the residue the goo-gone gets off, but i now no longer need to soak {taking up my sink and sometimes also a giant bowl on the counter} and scrape with my finger nails. HUGE time and space saver! plus, i kinda liked an excuse to pop in an old movie while being productive :-)
  • set oven for 200 degrees.
  • place jars on a cookie sheet or casserole dish.
  • leave in oven for 15 minutes
  • peel of sticker
  • *sadly this doesn't work for all labels because of the different types of glues different companies use*
this what residue was left over 
after the oven method. 
sooo much better!
  • use goo-gone and magic eraser to remove leftover residue. 

adding labels
this part is still on my to do list. i'm a sucker for good presentation - something about mis-matched lids does not make my heart go pitter patter.

  • chalkboard paint. perfect for a jar that will not always be used for the same thing. i'm not confident that throwing the painted lids in the dishwasher would go well, so i plan to always hand wash them.
  • stickers. perfect for jars filled with dried goods that will always be used for the same thing.

filling them up
ok, so now what? i have 8,000 bottles...what do i do with them? 

i'm so glad you asked.

let me take you on a tour of my glass collection {so far} and what i plan to do with each size and shape. {see the links for the recipes}

shatto milk bottles -
we're getting ready to start buying
raw milk from a dairy farm.
you must supply your own jars,
so what better to use than milk jars??
GT's kombucha bottles - 
again, genius strikes - when my kombucha
is ready to be refrigerated, i'll be
storing them in these. it's perfect
to have a quick drink to grab and my 

brewing jar is free to make the next batch. 
these would also make great water bottles.
tea of republic{left} and maple syrup{right} -
i use the small neck bottles for things like 
homemade dressings and homemade extracts
basically, anything i'll be pouring
not pictured
my small neck apple cider vinegar bottle from my 
post about infused orange vinegar. perfect for 
cleaning! it actually works better than the 
plastic one i had from target which leaked constantly.
salsa, spaghetti sauce, pickle, wheat germ jars, etc. -
these size bottles are great for: 


  • storing chopped onions 
  • freezing homemade chicken broth {i'm tired of buying ziplock bags, especially when i have "free" storage}
  • storing dry goods {nuts, lentils, grains, beans, etc}. 
  • i use the spaghetti jars when i make homemade yogurt. 
  • i keep my homemade mod podge in a jar this size
  • i store bacon grease in the fridge in one of these.
Santa Cruz Organic Juice -
i got these when they were on sale
$1/bottle and they're perfect for storing
unsweetend tea
for emery. i've been reading
about what combinations of herbs are good
for certain things for baby, and how much
healthier tea is than juice. these are
perfect for each brew. i also use these for the second fermentation of kombucha, to free up my brewing jars.
pesto & small artichoke jars - 
  • call me crazy, but i store pesto in these. now that my basil plant is doing well, i'll be making and freezing pesto soon!
  • i just made my first batch of homemade lotion and these jars are perfect because you can reach to the bottom to get every last bit of lotion out. 
  • these would also be great for the dry rubs andrew makes all the time for grilling 
sam's club artichoke jar -
this is my biggest jar - i can't wait to get more!


  • also great for dried bulk items or things like baking soda, brown sugar, powdered sugar, etc.
the possibilities are endless! as i'm writing this, i keep thinking of new things to add! my friend is starting to save jars for cute christmas gifts! if you have any ideas to add to the list, i'd love to hear them!


love and free storage,
amber.