Showing posts with label natural. Show all posts

Tuesday, February 19, 2013

garlic oil for ear infections.


as i slowly get off the mainstream path, i'm constantly fascinated by the gobs of information on natural remedies. i used to often think about how lucky i was to be alive in the current era with all the modern science of care. not to say that doctors aren't a huge blessing when truly needed, but i'm surprised it never occurred to me that all the generations before us "somehow" survived. it seems the only things you hear about are the bubonic plague and how no pioneer ever showered or washed their hands and come to the conclusion that society as a whole was completely ignorant before modern care came around. at least that's what i thought.

one of the most basic and common remedies i've found is homemade garlic oil for ear infections. i've found several websites and blog posts about it, but all were a little different. if i'm going to attempt to heal my family naturally, i want to read everything i can! this is a collection of my findings.


  1. heat 4 TB olive or coconut oil on low. once warm, add 2 cloves minced garlic and remove from heat. let sit for 30 minutes, stirring occasionally.
  2. i read different places that it can be stored in fridge for 4 - 14 days {range from 3 different sources}. just to be on the safe side, i opted for the smaller number {i only needed it for 3 days anyway}. either way, when you apply it to the ear, this article warns that if done while oil is cold, can cause nausea, vomiting, dizziness, and pain. heating in the microwave can cause hot spots, which would also be awful. i warmed my oil the same way you would warm a baby bottle - in a container of warm water, to bring it to room temp.
  3. you don't want to get garlic chunks in the ear! strain your oil through a cheese cloth or clean, fine mesh towel and squeeze all the excess into a bowl.
  4. now you're ready to go. i used a dropper from Whole Foods that cost about $2. {but i kept the oil stored in the glass bowl out of personal preference. i wanted to be able to feel that all the oil was the right temp, which i didn't feel like i could do if i stored and warmed the oil in a dropper bottle.} Apply 3-4 drops of oil per ear, about 20 minutes apart. this was not the easiest thing to do with a toddler, but she also had RSV so she was super lethargic and fell asleep in daddy's arms while he read her books. Andrew would hold her while she laid on one side, i'd add the drops, and they would read books or watch a movie until it was time to switch to the next ear.
  5. this is something i haven't come across on a blog, but that a friend {who's been doing this for years with her 4 boys} recommended - she slices a piece of garlic, sticks it over  the ear {large enough that it wont go in the canal},covers it with a bandaid, and leaves it for the day. While i'm sure it helped, i probably wont do this with a female toddler again. she was squirmy enough that i caught her hair in the bandaid which made her even more miserable during naps {she couldn't move her head without it pulling her hair}. If she was a boy with short hair or old enough to understand what was going on and hold still, i wouldn't have had the same problems and would do it again.
Misc. Notes:
  • our chiropractor told me a few days ago that a simple adjustment will often heal an ear infection. He explained that in young children, their ear canal is horizontal and often has a hard time draining properly. He said eventually, the canal forms a slant that enables easier drainage {which is why younger people tend to get infections more often.} He said that if a certain disk in the neck is slightly out of place, it can also effect the drainage. He said it's one of the most common reason he sees kids for adjustments and that it's simple and effective. We'll definitely be trying this next time!
  • garlic oil is the most basic way i've read to treat an infection on your own. it worked great for emery and i didn't have any concerns. if you feel like you need to do more, or that things aren't getting better, check out Creative Christian Mama's post on healing ear infections naturally. She did several things above and beyond the garlic oil that helped achieve a speedy recovery. She also notes several warning signs to look out for that might indicate the need for doctor's care.
  • i've considered buying an otoscope for personal use and reading up on what a healthy and infected ear look like for the times i can't tell and my kids can't communicate it to me. If we hadn't gone to the ER for emery's RSV, i would have had no idea she had the infection. She never tugged on her ears or acted like they were bothering her. i think i would be more comfortable being able to check her ears when she's acting differently just to make sure i'm not missing the signs!
  • if you're looking for natural remedies for other things, check out my pinterest collection! i've been gathering all sorts of information on treating different illnesses and have pinned them under several boards labeled "body care". If i have need for them in the future, i plan to post about my experiences with each of them.
what natural remedies have you tried? have they worked? i'd love to hear your experiences!

love and healthy toddlers,
amber.

Wednesday, September 12, 2012

the latest news...


baby #2 is on the way :-) 
due may 17th!


i'm sooo excited - i can't imagine having 2 little loves to take care of everyday! being pregnant is quite the mix of emotions though - we've had baby fever for months and couldn't be more excited but, on the flip side, with emery i had the most awful pregnancy i could have imagined. if it's as bad as last time, i'm going to miss out on the next 3 months of emery's life, pretty much completely.

with emery, i started feeling sick right at week 4 but didn't actually get sick until 6 1/2 weeks. with this one, i started feeling sick at week 3 and got sick for the first time at week 4. not looking good.

one thing that gives me hope is the fact that our life style has changed so much since emery was born. with emery, i used everything the doctor could provide for me {meds, a trip to the ER for dehydration, vitamins, etc} to eliminate my sickness, just short of bringing a nurse into our home to keep me on an IV drip. {they really did offer. i didn't even know you could do that.}

this time around, as soon as i found out i was pregnant, i dove into natural pregnancy websites and blog posts to read all i could about relieving morning sickness. {just for the record, i hate calling it morning sickness. i have all-freaking-day sickness. morning sickness sounds like the clouds have parted, angels are signing, and a glorious gift has been bestowed upon me in the form of a promise that i will only get sick in the mornings. that sounds like a dream. when i say morning sickness, i feel like i'm lying and tell you i've been given that special gift. i haven't.}

this blog post is to track:
  • what i'm reading
  • things i'm trying
  • what worked and didn't work

i plan to update this with more info and keep it as a personal journal for future reference. if anyone else is looking for info on natural pregnancy, check out Modern Alternative Pregnancy. this link is what i've been pouring over for the last few days. 

so far i've already:
  • made some infused water {she said to do lemon water, but i also added ginger slices and crushed up fennel in a tea steeper.} last time i couldn't handle the intensity of the ginger candies, so i'm hoping a little ginger in my water will be enough to ease the feeling.
  • eaten straight fennel . i remembered her mentioning fennel was good for you, so yesterday while i was doubled over in the kitchen with my eyes closed, trying to think happy thoughts, i remembered her praise of fennel. i pulled it out off the spice drawer and ate a small handful. within a few minutes, i was good to go. {i think this will only help for mild nausea. when it gets too bad, things like this don't help me.}
  • increased my protein. 
    1. we picked up sprouted bread and bagels from whole foods last night, along with some organic valley grass-fed cream cheese. it made the perfect breakfast this morning. sprouted grains are also high in vitamin B {i was taking vitamin B supplements with my last pregnancy because it reduces nausea. i'm hoping my diet will eliminate the need for pills this time around.} 
    2. as i'm typing this, i'm finishing up an amazing bowl of lentil soup from my aunt. 
    3. i also got some raw pepitas {shelled pumpkin seeds} from whole foods and plan to cook them in mild spices later today to have on hand to munch. Andrew scouted out the nuts in the whole food bins and said pepitas and peanuts had the highest protien content.
  • worn sea sickness bands. these only help me in the first few weeks, but i'll take what i can get.
  • sipped pregnancy tea. there's a link to a homemade liquid vitamin recipe below that i plan to make this week, but in the mean time, Yogi pregnancy tea contains a lot of the same herbs.
in the coming days and weeks, i also plan to:
  • make homemade chicken broth to sip when i can't eat anything else.
  • make this homemade liquid multivitamin. read her post for the benefits of making your own vs taking a pill. only downer is that it has to steep for 6 weeks.
  • regularly visit the chiropractor. i didn't start going to a chiropractor until after emery was born. i had no idea that simple adjustments can help relieve nausea. i hope this helps!
  • get acupuncture. i hate hate hate needles. but i love my daughter more. if getting acupuncture means that i'll be well enough to have quality time with emery, then sign me up.

you could probably assume this, but if i'm as sick as last time, the blog is going to be pitiful for awhile. there might be a post here and there if i'm able to do things worth blogging about, but for the most part, i'll probably be in the bathroom on my knees. {or making the most of the little moments i can get with emery without loosing my lunch}

anyone else have any natural "morning" sickness remedies?? i'll take any advice i can get! i'll try to keep you posted on how the natural remedies work {or don't work} for me.

love and running to the bathroom,
amber.

Thursday, August 9, 2012

throw it out thursday: lotion/moisturizer.

can't.stop.learning.

in a quest to get andrew's liver numbers low enough to have a normal rate for life insurance, i've learned so much. what started out as a diet change has turned into a life style overhaul. i look at everything i purchase differently now. that sunscreen my baby just *has* to have - hardly necessary. it's chock full of cancer causing ingredients and doesn't even block out the rays that are harmful. good thing advertising has people everywhere convinced it's a necessity and there are no other options. emery has been outside a lot this summer and only worn it once {during a lengthy trip to worlds of fun} and she hasn't been burned once. it's crazy what you can learn from other bloggers and homeopathic websites! 

the down side to our new lifestyle - not every homemade recipe i find is a winner. in fact, very few things i've tried have met my standards. i've been experimenting with homemade body wash, shampoo, conditioner, lotion, etc, etc. this is not a walk in the park, but i have such a passion for keeping my family healthy by using what God created to care and heal for our bodies, rather than what man has created! as i find recipes that actually work, i'll be posting the results and reviews here. hope it helps!

throw out: body lotions and moisturizers.

why: do a google search for "harmful chemicals in lotion" to find out why. in short - if you wouldn't eat it, don't let your body absorb it. the aveeno lotion i was using contains: dimethicone, avena sativa, kernal flour, benzyl alcohol, catyl alcohol, distearyldimonium chloride, glycerin, isopropyl, palmitate, petrolatum, and sodium chloride. i don't know what most of those things are. yikes. i definitely wouldn't eat that, so i don't want it soaking into my system.

replace with:


homemade lotion/moisturizer
{makes 2 cups}
recipe from: readymade.com


ingredients/tools:

  • glass measuring cup
  • pot
  • blender
  • microplane or small holes of cheese grater
  • spatula
  • clean glass jar{s} - i used 2 clean artichoke jars. i recommend something short and wide enough to stick your hand all the way to the bottom.
  • a few drops of essential oil {optional}
  • 3 TB beeswax {acts as an emulsifier. i got this beast for $6 at the farmers market}
  • 1 cup water or tea {for scent}
  • 1 cup oil 
    • side note about oils - you can use most oils {avoid vegetable, canola, sunflower, safflower}, but i prefer coconut. the smell was great & the lotion was pure white! i will warn you, the lotion takes on the texture of coconut oil. for those who don't know, coconut oil changes consistency depending on the temp. if 76 and higher, it's solid and cloudy, if 75 and below, it's clear and liquid. no matter the temp, it went on my skin great, but after using both coconut and EVOO versions, i actually prefer the solid texture of the coconut oil because i found i used less and it lasted longer than the runnier EVOO batch. however, if you're giving it as a gift, i'd warn the recipient so they don't think something's wrong with it! the only con for me is that coconut oil is more expensive {best price i've found is at costco}. 
    • i used olive oil the second time, to save $ and i regret it! i don't like the smell of the olive oil, the lotion is tinted yellow, and the scent of the olive oil drowns out the scent of the essential oils i used. however, the pro is that it's more budget friendly, and has a smooth texture if you prefer that. 
directions:

  • put 1 cup water into blender.


  • pour 1 cup oil into measuring cup.
  • grate 3 TB beeswax, place in measuring cup with oil.

i've made 2 batches of lotion {4 cups} and
i've only used that tiny corner.  

  • place measuring cup in pot, pour water in pot to reach up to the level of the oil. 


  • bring the water to a gentle boil. stir the oil until the wax melts/disappears.


  •  let the oil sit to cool for 2 minutes.

  • turn on the blender, keeping the center of the blender lid off. slowly pour oil mixture into blender.


  •  some water will remain on the edges - use spatula to mix it in.

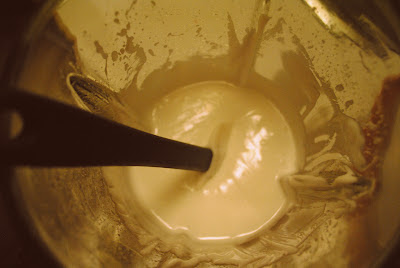
you can see the color difference -
this photo is lotion made with EVOO
and the one below is made with coconut oil.

    
  • pour lotion into jars. let cool completely before screwing on lids. {the condensation can cause mold}

  • according to readymade.com, this lasts 3 months on the shelf, 6 months in the fridge. with emery and i using it every other day and andrew using it occasionally, it lasted us almost exactly 2 months. i plan to make a double batch next time and keep the extra in the fridge.
i love this more than any other homemade product i've tried. my very favorite thing about it -since making the switch, emery's eczema has disappeared. i love that i've saved money on a prescription {and the lotion itself} by choosing not to put chemicals on my baby.

the only con - in the middle of using this lotion, i switched to a homemade body wash that called for Dr Bronners Soap. the soap left my skin feeling waxy, and when i went to put on the lotion, the water separated from the oil and left water beads all over my skin. super weird! i was still moisturized from the oil, but the little beads take a few minutes to dry up! if you use Dr Bronners, you've been warned!

also, i know that i wont always have the leisure to make things like homemade lotion. instead of waiting until i used up all our store bought lotion, i just tucked it away in the back of the closet to save for those times i can’t get around to making it.

what are your favorite homemade recipes?? i'm trying everything i can, so i'm craving some good recommendations!

love and healthy families,
amber.