Wednesday, August 29, 2012

letter R sensory bucket.

i love looking back on my life and seeing all the ways God directed me exactly where i needed to be, even before i was a believer. working at the preschool taught me so much and prepared me in so many ways for being a mom. the biggest bonus - all the stuff i bought for my classroom when i was single and had the cash to do it. i saved all of it for my future kids and am sooo thankful to have activities on hand! 

whenever we get bored, i tell emery we're going to pick something out of the super secret special activity room {also known as a closet in the basement}. i think it's her favorite room in the house!
toddler/preschooler activity: Letter R Sound Box

at the preschool, every week was devoted to a different letter. we would read a book specific to that letter, do an art project about the letter, and i would create centers themed around the letter. One of my centers for letter R was an R Sound Box...

Tools:
  • small rubbermaid container {i got this at the dollar store, but they also have them in sets of 5 at target.}
  • rice {or if you  do a different letter, pick something else, like confetti for C, pebbles for P, sand for S, etc.}
  • a few objects that start with your letter. i choose a ruler, rose, red ribbon, race car, ring, rooster, and rock. most of these i got at the dollar store.

obviously emery isn't learning what starts with what yet, but it's a fun sensory bucket just the same. I still talked with her about everything like she was 4, but she mostly just wanted to throw rice on the floor. all in all, it was a good day!

she loved finding all the treasures and she loved making a mess! 
i don't mind her doing it, as long as it's supervised and structured!

burying mommy's hand in the rice
love and the alphabet, 
amber.

PS - this post was featured on Creative Christian Mama's Linky Party! i'm more than a little pumped!

Thursday, August 23, 2012

throw it out thursday: eye make up remover.

when i ran out of eye make up remover a few months ago, we were in an unexpected financial bind. i didn't want to spend any extra money until i knew what was going to happen {long story} so i hopped on pinterest and started searching. 

i found TONS of eye make up remover recipes, but they were all AWFUL! maybe i was just spoiled with the effectiveness of the brand i had been using, but the recipes i was finding took 2-3 cotton rounds, burning eyes, and gobs of remover to get my eyes completely make up free. not cool.

i have also been on an insane blog kick - subscribing to tons of blogs through facebook and email so that i have to do less work when finding healthy alternatives - the research now comes to me! anyways, a few weeks before this, i had signed up for emails from http://www.crunchybetty.com. the wonderful lady read my mind and sent out an email about all natural face wash and eye make up remover. she only briefly mentioned that she used EVOO as eye make up remover, so i thought i would share what i did and give all the credit to her! the best part is the ingredient list: 


ingredients: 
  • EVOO
that's it. {maybe crunchy betty is crazy...surely there's more to it!?}

tools:
  • eye dropper {i got this one for under $3 at whole foods}
  • cotton round 

 directions:

  • i find this works best right after i've gotten out of the shower, or if i've held a hot wash cloth over my face for a minute, to soften the mascara.
  • soak the cotton round with water. squeeze out all excess. {i cannot stress how important this is. when i first tried EVOO as eye make up remover, i HATED it because i didn't do this. somehow it helps the olive oil spread better and not get globs in your eyes - which BURNS}
  • fill dropper all the way with EVOO, squirt evenly over cotton round. use fingers to spread it out more. 


  • remove eye make up as usual.


love and less chemicals,
amber.

Wednesday, August 22, 2012

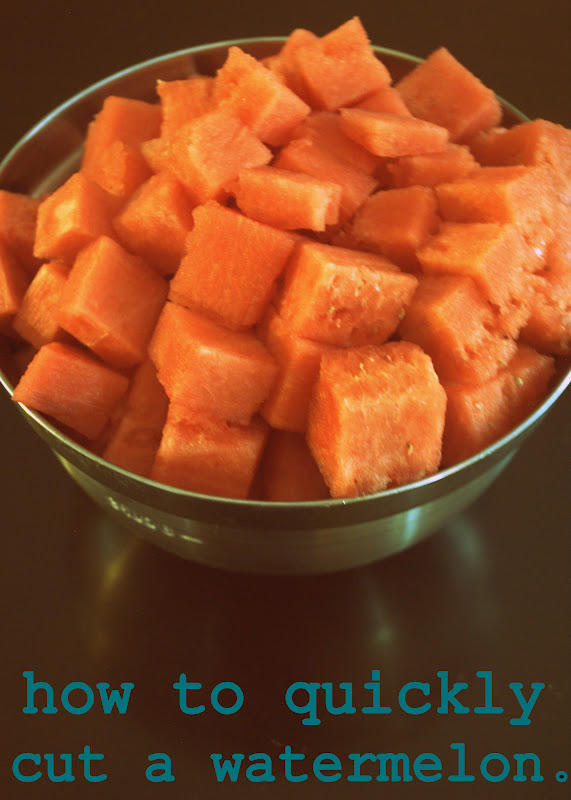
how to quickly cut a watermelon.

a few years ago i was over at my husband's aunt house and as usual, she was working in the kitchen. i pretty much always sit at the counter and watch her work because i always learn something new at her house!

i dont even know that she knows this, but one particular day i'm pretty sure my eyes were bugging out of my head and my jaw was on the floor {but i think i was trying to play it cool because she was telling me story}

as a little background to this event - i got married when i was 19. i was super insecure in pretty much everything homemaking related and was pretty positive everyone out there knew exactly what they were doing except me. being 25 now and having talked with many married friends, i now know this isn't true. there are tons of homemakers out there that are totally winging it! i'm not alone!

so, back to my story. i went on with my life for years assuming everyone else knew this trick but me until just a few weeks ago my mom needed to cut up a watermelon and i offered to do it for her. she went upstairs for a few minutes and when she came back down, i was done. i'm pretty sure her eyes were bugging out of her head and her jaw was on the floor. she wanted to know how in the heck it didn't take me 14 hours to wrestle with and conquer the watermelon.

this, dear people, is the answer:

get yourself a watermelon.
and a knife.
and a cutting board.
cut the beast into 4 sections.
from the back of the rind
to the front of the fruit,
cut even sections.
then, coming down from the top,
cut from rind to rind
to make bite sized chunks.
then, going from front to back,
make the final cut, separating the chunks
from the rind and rest of the watermelon.
as you loosen a section,
keep the chunks on the knife,
secure them with your hand,
and dump them in the bowl.
pour the juice from the rind
into a glass and drink it!
have flashbacks to my honeymoon in mexico.
sit back and enjoy the fact
that you did that wicked fast.
if you're looking for something to do with all the watermelon you  bought and cut just to try out this trick, i have a solution. last night we made this amazing watermelon and arugula salad from the Whole Foods website. i left out the red onion cause we were going to someone's house and wanted to be able to talk to them after dinner, but you can leave it in if you don't mind onion breath. 

hopefully this helped some newbie 19 year old wife out there...if not, at least my mom now has photos to go along with my verbal explanation.

love and watermelon juice,
amber.

Tuesday, August 21, 2012

balloon sensory matching.

i wouldn't change my job title for anything. being a wife and mom is the BEST! emery's curiosity is my daily reward for staying home - we have the best adventures and she makes everything so much fun. yesterday wasn't any different...

toddler activity: balloon sensory matching


when i worked at the preschool, one of my all time favorite themes was the week devoted to the 5 senses. one of the center time activities was a matching game. I filled balloons with various things and created cards with pictures of each thing. the kids got to squish, poke, and prod and then lay the balloons on the card they thought was the right match.

i know emery isn't there yet, but i keep seeing sensory balloons on pinterest and thought i'd make them again! i still have the cards, so for the sake of the post, i thought i'd fill them with what's in the pictures, even though it wont matter for her right now!
all you need is a funnel {for some things},
the balloons, and various items
that are different sizes and textures.
feeling the rice balloon!
she loved watching mommy 

use the funnel to fill it!
things got a little messy...
corn through our
funnel was a no go.
so we put them in ourselves.
 

she wanted in that flour bag so bad!
funneling the sand.
we also did shampoo and marbles.
honestly, i was surprised
how much she loved these -
i didn't think they would
last that long, but she
loved picking them up
one by one and squishing them!

in a few years, i'll add in the cards and i wont let her help me fill them so she wont know what's in what!


i just found the pictures on google images, printed them off, traced a balloon image, and laminated them {which definitely isn't necessary, i just had access to one at the preschool and with 12 new kids every year, i needed them to last!}


{marbles, corn, rice.}
{flour, shampoo, sand.}

love and guessing games,
amber.

PS - Creative Christian Mama  and One Creative Mommy featured this post in their weekly linky parties! check out their blogs!

Thursday, August 16, 2012

throw it out thursday: microwave.

i know what you're thinking right now. "this girl is crazy. i can see why she wouldn't want to clean her house with chemicals, but really, no microwave? this is over the top."

i'll be the first to admit i've taken the plunge. i've been doing things the last few months my former self would have made fun of me for. only conspiracy theorists avoid microwaves...right?

for me, the reason i thought that in the past was because of a lack of education. i know there are plenty of people out there who know the facts but aren't bothered by it - to each his own. after doing the research though, i couldn't help but make the change. does this mean i will never eat something that's been microwaved at someone else's house? no. it does mean that i'm avoiding continual, habitual microwave use. 

throw out: microwave. {i just stuck mine in the basement}

why: read this and this for the science behind it. {really, go read them. esp the 2nd  one - it's an easier read.} in short, the microwave kills most nutrients in your food. my family eats for the purpose of nourishing our bodies, not just fill to our stomachs. if food heated by a microwave is void of nutrients, why eat it? food helps my family grow properly, to have the right vitamins and minerals, to give us energy, to help fight illness, etc, etc. if we can't get that with microwaved food, then i need to change what i'm doing. one of the articles states that vitamin B is no longer present in food after being microwaved. when i was pregnant with emery i had to take vitamin b pills to help with nausea and energy...i wonder if i hadn't used a microwave if i could have skipped the pills.

how we did it:

honestly, i was skeptical that i could make this work. i was totally sold on the concept of faster meaning easier, so i didn't want to get rid of the microwave until i knew i could do it. we left it on the counter and for several weeks and tried not to use it. i had a moment of panic when i needed to soften butter for cookies and hadn't set it out in time, but other than that, it was super easy! {and i have successfully softened butter in the oven now!} once we both felt like we could survive without it, we put it in the basement.

  • take food out of the fridge 30-45 min before you want to eat, to get it closer to room temp.

{salmon and veggies for emery and i.
the small pampered chef bar pan
is perfect for reheating lunch.
i just use the pan as a plate!}
  • set the oven for 250-300
  • place food in oven safe dish/cookie sheet, place in oven. 
  • walk away. {i used to check it every few minutes, thinking it would burn if i got distracted. after a week or two, i finally noticed that the same time it was warm enough was right after i could start to smell the food. it's the perfect alarm! so walk away, play with your kids, read your bible, and let your nose tell you when lunch is ready.}
  • if you're wanting to heat something like leftover pancakes - use a toaster!


here are the reasons i LOVE not using a microwave:

  • COUNTER SPACE!!!!! 
  • nutrient rich food.
  • texture & flavor - i was excited to find that eggs reheated in the oven taste exactly the same as when you make them fresh. eggs reheated in the microwave? not so much.
  • convenience. it may sound crazy, but for me, it's actually more convenient to heat things slowly.
    • food heated in a microwave cools off SOOO quickly! if i heat something up in the microwave and then get distracted with emery, i have to warm it up all over again. usually it's too hot when i get it out, there's a 60 second window when it's the perfect temp, and then my last few bites are cold again. not cool.
    • food heated in the oven stays warm for awhile - it's ok if i get distracted - it's still warm when i get back to it. it's also ok if i leave it in the oven for several minutes after i start to smell it - the oven is set so low it wont burn or dry out in a few extra minutes. the oven is mommy-friendly! {but it does take a few days to get in the mindset of thinking ahead. don't give up if it doesn't become a habit quickly - just munch on some fruit while you wait for it to heat up!}
i definitely am learning to plan ahead - i try to think about dinner in the morning - do i need to get out some frozen chicken broth so it will thaw in time for dinner? do i need room temp butter for dessert? i've forgotten both of these until right before i needed them and still survived, but it made things take longer - i put the jar of chicken broth in warm water to melt it and put the butter in a dish in the oven and stirred it every few minutes. thinking ahead would have save me lots of time! forming new habits after 5 years of being a homemaker is hard, but worth it! sometimes change is good :-)

love and good health,
amber.

Monday, August 13, 2012

mystery ingredient monday: baby bok choy.


once upon a time, before i was sick-as-a-dog-pregnant, andrew and i accidentally started a sort of game/tradition...i don't know what to call it. i don't remember how it started. all i know is that it was fun. 

i had almost forgotten about it until the other day, andrew comes home with a big bag from an asian market and says "baby bok choy. that's your mystery ingredient." i then had a few days to find or create a new recipe to try out, using baby bok choy. best.game.ever. 

i got to work, researching baby bok choy recipes on pinterest and finally settled on one that sounded good for a 100+ degree day.

recipe: Crisp Baby Bok Choy Greens in Tangy-Sweet, Sesame-Soy Vinaigrette
slightly adapted from: thecozyapron.com

hey, baby.


Crisp Baby Bok Choy Greens in Tangy-Sweet, Sesame-Soy Vinaigrette
{slightly adapted} {serves 4}
the goods. 
{except the garlic, 
i removed it from the recipe below, 
it was too strong.}
ingredients: 
8 baby bok choy, thinly sliced {including leafy greens}, rinsed, dried. {i rinse first because there is so much dirt btwn all the leaves it's hard to get out before it's chopped. i used my salad spinner.}
½ cup shredded carrot {i used the julienne part of my mandolin}
1 TB toasted sesame seeds, for garnish
2 tsp toasted sesame seeds
1 TB honey
1 TB soy sauce or braggs liquid aminos
3 TB rice wine vinegar
1 TB toasted sesame oil
3 TB EVOO
directions:
  • place sliced Bok Choy and carrot into a large bowl.
  • in a small bowl, add all remaining ingredients and whisk together until well combined.

is this a joke? this is so easy.
  • pour the vinaigrette over the greens and carrots, toss together to coat.
  • divide among plates, sprinkle with sesame seeds.


yum.
i served it with this yummy soup: manifestvegan.com, but added an extra 2+ tsp of garam masala to the pot before simmering and did chicken broth instead of water. i'm not vegan. at all.


love and kitchen experiments,
amber.

Thursday, August 9, 2012

throw it out thursday: lotion/moisturizer.

can't.stop.learning.

in a quest to get andrew's liver numbers low enough to have a normal rate for life insurance, i've learned so much. what started out as a diet change has turned into a life style overhaul. i look at everything i purchase differently now. that sunscreen my baby just *has* to have - hardly necessary. it's chock full of cancer causing ingredients and doesn't even block out the rays that are harmful. good thing advertising has people everywhere convinced it's a necessity and there are no other options. emery has been outside a lot this summer and only worn it once {during a lengthy trip to worlds of fun} and she hasn't been burned once. it's crazy what you can learn from other bloggers and homeopathic websites! 

the down side to our new lifestyle - not every homemade recipe i find is a winner. in fact, very few things i've tried have met my standards. i've been experimenting with homemade body wash, shampoo, conditioner, lotion, etc, etc. this is not a walk in the park, but i have such a passion for keeping my family healthy by using what God created to care and heal for our bodies, rather than what man has created! as i find recipes that actually work, i'll be posting the results and reviews here. hope it helps!

throw out: body lotions and moisturizers.

why: do a google search for "harmful chemicals in lotion" to find out why. in short - if you wouldn't eat it, don't let your body absorb it. the aveeno lotion i was using contains: dimethicone, avena sativa, kernal flour, benzyl alcohol, catyl alcohol, distearyldimonium chloride, glycerin, isopropyl, palmitate, petrolatum, and sodium chloride. i don't know what most of those things are. yikes. i definitely wouldn't eat that, so i don't want it soaking into my system.

replace with:


homemade lotion/moisturizer
{makes 2 cups}
recipe from: readymade.com


ingredients/tools:

  • glass measuring cup
  • pot
  • blender
  • microplane or small holes of cheese grater
  • spatula
  • clean glass jar{s} - i used 2 clean artichoke jars. i recommend something short and wide enough to stick your hand all the way to the bottom.
  • a few drops of essential oil {optional}
  • 3 TB beeswax {acts as an emulsifier. i got this beast for $6 at the farmers market}
  • 1 cup water or tea {for scent}
  • 1 cup oil 
    • side note about oils - you can use most oils {avoid vegetable, canola, sunflower, safflower}, but i prefer coconut. the smell was great & the lotion was pure white! i will warn you, the lotion takes on the texture of coconut oil. for those who don't know, coconut oil changes consistency depending on the temp. if 76 and higher, it's solid and cloudy, if 75 and below, it's clear and liquid. no matter the temp, it went on my skin great, but after using both coconut and EVOO versions, i actually prefer the solid texture of the coconut oil because i found i used less and it lasted longer than the runnier EVOO batch. however, if you're giving it as a gift, i'd warn the recipient so they don't think something's wrong with it! the only con for me is that coconut oil is more expensive {best price i've found is at costco}. 
    • i used olive oil the second time, to save $ and i regret it! i don't like the smell of the olive oil, the lotion is tinted yellow, and the scent of the olive oil drowns out the scent of the essential oils i used. however, the pro is that it's more budget friendly, and has a smooth texture if you prefer that. 
directions:

  • put 1 cup water into blender.


  • pour 1 cup oil into measuring cup.
  • grate 3 TB beeswax, place in measuring cup with oil.

i've made 2 batches of lotion {4 cups} and
i've only used that tiny corner.  

  • place measuring cup in pot, pour water in pot to reach up to the level of the oil. 


  • bring the water to a gentle boil. stir the oil until the wax melts/disappears.


  •  let the oil sit to cool for 2 minutes.

  • turn on the blender, keeping the center of the blender lid off. slowly pour oil mixture into blender.


  •  some water will remain on the edges - use spatula to mix it in.

you can see the color difference -
this photo is lotion made with EVOO
and the one below is made with coconut oil.

    
  • pour lotion into jars. let cool completely before screwing on lids. {the condensation can cause mold}

  • according to readymade.com, this lasts 3 months on the shelf, 6 months in the fridge. with emery and i using it every other day and andrew using it occasionally, it lasted us almost exactly 2 months. i plan to make a double batch next time and keep the extra in the fridge.
i love this more than any other homemade product i've tried. my very favorite thing about it -since making the switch, emery's eczema has disappeared. i love that i've saved money on a prescription {and the lotion itself} by choosing not to put chemicals on my baby.

the only con - in the middle of using this lotion, i switched to a homemade body wash that called for Dr Bronners Soap. the soap left my skin feeling waxy, and when i went to put on the lotion, the water separated from the oil and left water beads all over my skin. super weird! i was still moisturized from the oil, but the little beads take a few minutes to dry up! if you use Dr Bronners, you've been warned!

also, i know that i wont always have the leisure to make things like homemade lotion. instead of waiting until i used up all our store bought lotion, i just tucked it away in the back of the closet to save for those times i can’t get around to making it.

what are your favorite homemade recipes?? i'm trying everything i can, so i'm craving some good recommendations!

love and healthy families,
amber.